Student Attendance (SAMS)
Q1 - What is SAMS?
Q4 - Why am I getting 'Unauthorized User' while login into SAMS?
Q8 - My class has been relocated, how can I change room number for my class?
Q10 - How can I assign TA (Teaching Assistant) for my class?
Q11 - How can I know using SAMS if a student is on Medical leave?
Q12 - Some of the student are not appearing in attendance list, why?
Q14 - Which browser and browser version should I use to access SAMS?
Q1 - What is SAMS?
SAMS is a Student Attendance Management System that allows faculty to record or maintain attendance of students.
Q2 - How can I access SAMS?
There are two ways to access SAMS as given below:
Through SNU Links:
- Open Url “https://snulinks.snu.edu.in/”
- After login, click on ‘SAMS – Student Attendance Management System’ to open the application.
Directly through URL:
User can directly open the application through URL given below: “https://attendance.webapps.snu.edu.in/public/application/login/index”
Q3 - Why am I getting 'Invalid User' while login into SAMS?
“Invalid User” notification comes in case user enters wrong SNU Net Id or Password.
Q4 - Why am I getting 'Unauthorized User' while login into SAMS?
This notification comes when user tries to login the application for which he/she is not authorized.
Q5 - How can I take WiFi base class attendance?
Class strength should more than 60 and classroom should be equipped with WiFi access point then only faculty will get the option to take wifi based class attendance. Please follow steps as given below to take automatic attendance of a class:
Step 1: Login to SAMS Application
Step 2: Click on ‘Take Attendance’ Tab, a screen having list of courses scheduled at that time in selected will get opened. Faculty will be able to see list of Students registered for selected course.

Step 3: Ask students to connect with Wi-Fi
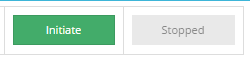
Step 4: Click “Initiate” button to initiate the attendance
Step 5: Ask students to "Login" in student version of SAMS and mark attendance
Step 6: System will start capturing the student attendance automatically through the configured Wi-Fi access points. Faculty can press F5 to refresh the page to view the current Total Present and Total absent for the class.
Step 7: Press “Stop” button to stop the attendance. After stopping attendance no Student will be able to mark attendance through their Gadgets.
Step 8: Save attendance by clicking ‘Save’ button
Step 9: Click ‘Submit’ for final attendance submission
Please Note: After submission, faculty will not be able to edit attendance.
Q6 - How can I take class attendance manually?
Faculty can take manual class attendance using folllowing two ways:
Mark Attendance through ‘Take Attendance’ option of the application:
Step 1: Login to SAMS Application
Step 2: Click on ‘Take Attendance’ Tab, a screen having list of courses scheduled at that time in selected will get opened. Faculty will be able to see list of Students registered for selected course.
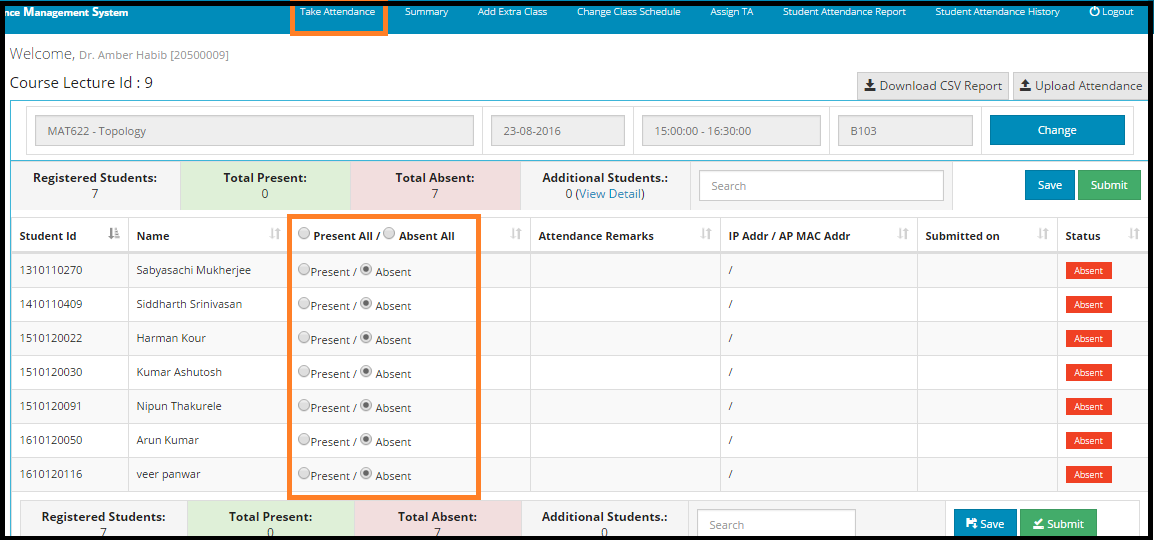
Step 3: Select the “Present” and “Absent” radio button to marks attendance for students. Faculty can choose “Present All” and mark absent on specific cases or choose “Absent All” and mark Present for specific cases.
Step 4: Save attendance by clicking ‘Save’ button
Step5: Click ‘Submit’ button for final attendance submission
Please Note: After submission, faculty will not be able to edit attendance.
Upload attendance - where attendance is taken on paper:
Step 1: Login SAMS Application
Step 2: Click on ‘Take Attendance’ Tab, a screen having list of courses scheduled at that time in selected will get opened. Faculty will be able to see list of Students registered for selected course.
Step3: Download CSV report.

Step4: Enter "Present" or "Absent" in attendance status coulmn for each student in downloaded excel file and save that file.

Step 5: Click ‘Upload Attendance’ button. "Upload Attendance Details" popup will open.
Step 6: Choose updated CSV Report and click on ‘Upload CSV’ button to upload the file that you have saved in step 4.

Step 7: Save attendance by clicking ‘Save’ button
Step 8: Click ‘Submit’ button for final attendance submission
Please Note: After submission, faculty will not be able to edit attendance.
Q7 - How can I take my previous class attendance?
Please follow steps given below to take attendance of your previous class:
Step 1: Login into SAMS
Step 2: Click on ‘Summary’ Tab to open Attendance Summary page

Step 3: Click on ‘Course’ with the dateyou missed attendance for
Step 4: ‘Take Attendance’ page will get open. You can mark attendance manually or you can upload attendance through downloaded excel file format.

Step 5: Save attendance by clicking ‘Save’ button
Step 7: Click on ‘Submit’ button for final attendance submission
Please Note: After submission faculty will not be able to edit attendance status.
Q8 - My class has been relocated, how can I change room number for my class?
Please follow steps as given below to change room number for any of your class:
Step 1: Open ‘Take Attendance’ page
- For current class, you can open this page directly by clicking on ‘Take Attendance’ tab
- For previous classes, you can open this page through Summary page
- Open Summary page by clicking on ‘Summary’ tab
- Click on ‘Course’ (for which faculty wants to change class room number) to open ‘Take Attendance’ page for that course.
Step 2: Click on ‘Change’ button

Step 3: ‘Change Attendance Details’ popup will open on click of "Change" button

Step 4: Change class room details through ‘Class Room’ field

Step 5: Click on ‘Change’ button to change the class room
Please Note: System will not check for room availability. Please make sure whether room is free for you to take class.
Q9 - How can I change my future class schedule?
Please follow steps as give below to change your future class schedule:
Step 1: Click on ‘Change Class Schedule’ tab

Step 2: Select Course, Course Component and Date for which you want to change the schedule.

Step 3: Click on ‘Check Present Class Details’ button. On clicking, it will open the class details having options to change Class Room number, Start Time, End Time and Class Date.
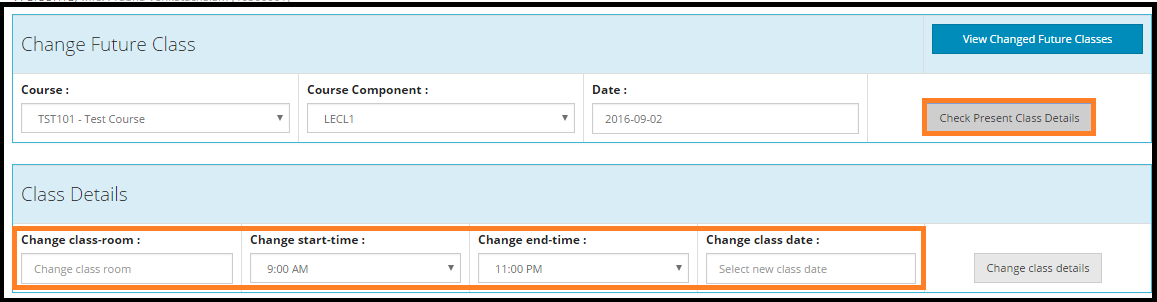
Step 4: Change the details
Step 5: Click on ‘Change class details’ button to save the changed details

Step 6: Click on ‘View Changed Future Classes’ button to view the list of rescheduled classes to verify changes done

Q10 - How can I assign TA (Teaching Assistant) for my class?
Please follow steps as given below to assign TA for your class:
Step 1: Click on ‘Assign TA’ tab
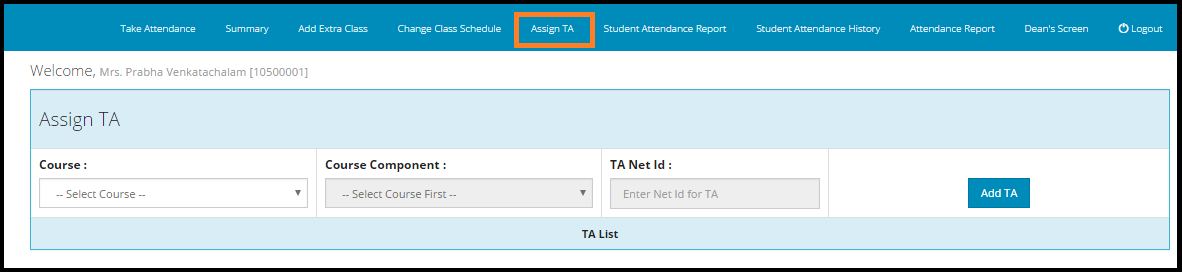
Step 2: Select ‘Course’ and ‘Course Component’ for which faculty wants to assign TA.

Step 3: Provide TA (Teaching Assistant) Net Id

Step 4: Click on ‘Add TA’ button to add the TA for selected Course, Course Component

Q11 - How can I know using SAMS if a student is on Medical leave?
Medical leaves of students are maintained by Dean’s office in SAMS. If Dean’s office have added Medical Leave for a student then faculty will be able to see it on ‘Take Attendance' page in ‘Student Leave List’ section

Q12 - Some of the student are not appearing in attendance list, why?
Attendance application always lists the student who are registered for the course in Peoplesoft. If a student is not formally registered for the course in Peoplesoft, his/her name will not appear in the list in attendance list.
In this case ask student to first contact Dean’s office and to get him/her registered for the Course in the Peoplesoft (ERP).
Till the student is not registered, add the student as additional student for reference purpose.
Q13 - How can I add an additional student in attendance list, if student is not coming by default in attendance list?
Please follow steps as given below to add an additional student while taking class attendance:
Step1: Open ‘Take Attendance’ page
Step 2: Provide Student Id in ‘Student ID of Additional Students’ textbox
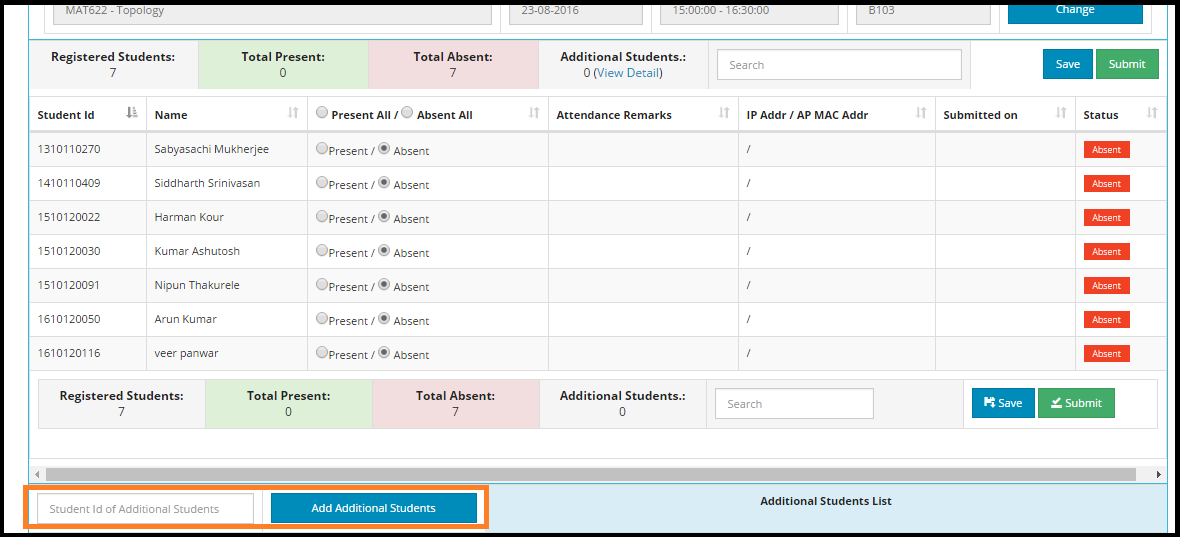
Case 3: Click ‘Add Additional Students’ button to add student
Q14 - Which browser and browser version should I use to access SAMS?
Following browsers are recommended to use SAMS:
- Chrome browser with version 60.0.3112 or upper than this.
- Mozilla firefox browser with version 55.0.2 or upper than this.
Q15 - How can I learn more about SAMS?
You can learn more about SAMS through 'User Guide' that is provided in the application.
Q16 - How can I get assistance if I need it?
However user guide is available to help about the working of this application, yet you can raise a ticket with IT Helpdesk for application assistance. Applications support team will contact you and assist.